

How To Build A Blog With Python
In this tutorial, we are going to create a complete blog website using the Django framework step by step. So, let's get started.
Django is a web framework of Python and it is one of the very easiest back-end frameworks to learn. Before you get started, you should have some prerequisites to follow this tutorial smoothly.
The prerequisites are Front-End Basics (You should be familiar with at least the basics of HTML and CSS) and Python Basics (You should be familiar with the syntax of Python and the working of the language).
Installing Django
Let's start the project by installing Django in your system. If you already have Django installed, then skip this part.
To install Django on Windows, you just open your command prompt (CMD) and type in the following command, and hit enter.
pip install django To install Django on either MAC or Linux, open your command line and type in the following command, and hit enter.
pip3 install django That's it. The system will automatically download and install Django on your system.
Also, you need to have an IDE (Code editor) to follow along with this tutorial. For this project, I'm using the Atom editor.
Now we have everything ready. I divided the entire project into 7 digestible steps so that you can follow along with me without getting overwhelmed. So, let's start the project right away.
Step.1: Start the project and app
Create a new folder on your Desktop. I named my folder 'BlogProject'. Open your command line (CMD) and navigate to that folder.
cd Desktop cd BlogProject Now, create a new project called 'blog'. Type in the following command and hit enter to do so.
django-admin startproject blog Navigate to the 'blog' folder and start a new app called 'articles'.
cd blog python manage.py startapp articles If you are on MAC/Linux, type in python3 instead of python. Now, let's do the migration.
python manage.py migrate Finally, we can run the server using the following command.
python manage.py runserver 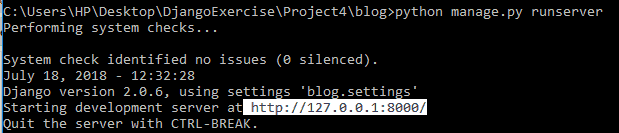
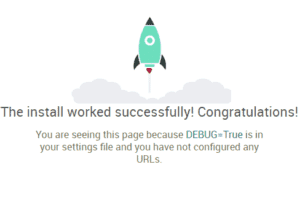
Copy the URL you get and paste it on a new tab of your web browser. Hit enter and you will see a rocket if everything is correct.
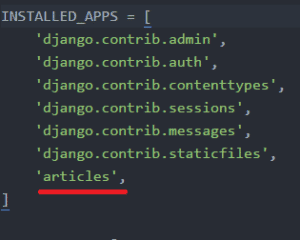
Now, open your IDE ( I'm using Atom). Open the project folder (blog) on your IDE. Go to settings.py inside the blog folder. Add the name of the app we created in the INSTALLED_APPS list.
Step.2: Create the models
In this step, we are going to create database models. We are creating a blog, so we need three things: author, title, and body. So, we need to create three fields in our model to input these three things.
We set the author as a ForeignKey so that the author can write multiple articles(many-to-one relation). So, open models.py and paste the following code there.
from django.db import models class Article(models.Model): author = models.ForeignKey('auth.User', on_delete = models.CASCADE,) title = models.CharField(max_length = 100) body = models.TextField() def __str__(self): return self.title We just created a class called 'Article' which is our model. The author field is set as a foreign key using the ForeignKey() method. Whenever we use this method, we have to mention 'on_delete' argument.
We have to set it as models.CASCADE, so that whenever we delete something, it will take care of that. The first parameter of this method is 'auth.User'.
The 'auth' is kind of a default way of handling user authentication in Django. For the title, we used a character field with 100 maximum characters and for the body, we used a text field.
The __str__ method is used to display the title as the object name in the admin panel.
Now, you have created your model. Let's go to admin.py file and register your model.
from django.contrib import admin from .models import Article admin.site.register(Article) Step.3: Setting Up the Admin
Open your command line and inside the 'blog' folder, type in the following command.
python manage.py makemigrations articles If you are on MAC/Linux, type in python3 instead of python. After that, type in the following command.
python manage.py migrate articles Now, it's time to create our user to log into the admin panel.
python manage.py createsuperuser After that, create a user by typing in your username, email, and password. The superuser will be created successfully.
Now, let's run the server.
python manage.py runserver 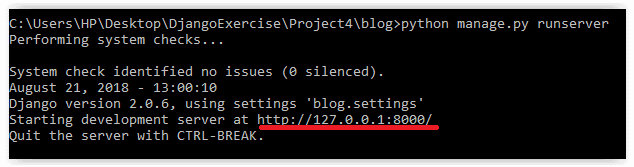
Copy the URL and paste it on a new tab. Add '/admin' to the URL and let's check whether our admin is created successfully or not.

Now, log in to the admin area using your id and password. Then you will find an interface like this.
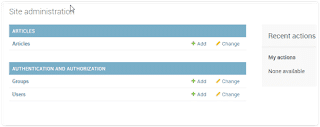
You can click the add button in the articles area to add new articles to your blog. Let's add a few articles and save them.
Step 4: Setting up the URLs
Now, go to the urls.py file and make the following changes to the code at the bottom portion of that file.
from django.contrib import admin from django.urls import path, include urlpatterns = [ path('admin/', admin.site.urls), path('', include('articles.urls')), ] We mentioned the articles.urls file but that does not exist there. But before that, we need to create the views. So open views.py and create your views there.
from django.views.generic import ListView from . models import Article class ArticleListView(ListView): model = Article template_name = 'home.html' We just created an ArticleListView in our views.py file. Now let's create a file named 'urls.py' inside the articles folder. Copy and paste this piece of code there.
from django.urls import path from . import views urlpatterns = [ path('', views.ArticleListView.as_view(), name='home'), ] Now, it's time to create our templates folder. Create a new folder called 'templates' inside the blog folder (which is the project folder, not the inner folder). Inside that folder, create a new file and name it 'home.html'.
Now, go into settings.py and we need to configure our templates. There is a list called TEMPLATES in that file. Make the following changes to the DIRS there.
'DIRS': [os.path.join(BASE_DIR, 'templates')], Step 5: Setting up the home page
Open the home.html file and paste the following HTML code there.
<!DOCTYPE html> <html lang="en"> <head> <meta charset="UTF-8"> <meta name="viewport" content="width=device-width, initial-scale=1.0"> <meta http-equiv="X-UA-Compatible" content="ie=edge"> <title>My Blog</title> </head> <body> <header> <h1> <a href="">My Personal Blog</a> </h1> </header> <div class="container"> {% block content %} {% for i in object_list %} <div class="article"> <h3><a href="">{{ i.title }}</a></h3> <p>{{ i.body }}</p> </div> {% endfor %} {% endblock content %} </div> </body> </html> Note the syntax here. Everything that we need to fetch from the database is written inside the {% block content %} section.
This section ends at {% endblock content %}. All the articles are fetched one by one using a 'for loop'.
I am not talking much about the HTML part since I assume that you already know the basics of HTML and also, this is a tutorial that focuses on the backend rather than the design of the page.
Step 6: Including static files
Let's see how we can include static files like CSS files in our blog. For that, create a new folder called 'static' inside the blog folder (which is the project folder, not the inner folder).
We have to link this in the settings file. So open your settings.py file and type in the following piece of code at the bottom, below the STATIC_URL part, which is already there.
STATICFILES_DIRS = [os.path.join(BASE_DIR, 'static')] Now, let's add styling to our blog. Create a new folder called 'css' inside the static folder. Inside css, create a new file and name it 'style.css'.
You can add your CSS styles here as you like. For simplicity, I am adding only a few styling to my blog. Paste the following code into the style.css file.
body{ background-color: #eee; color: #222; } We need to link the CSS file in our home.html. So open home.html and add the following line of code between the <head> </head> tags.
<link rel="stylesheet" href="{% static 'css/style.css' %}"> Note that the href part is different from what we normally do with HTML and CSS. Here, we have to link in the Django way.
Also, we need to mention the home.html that we are using static files. So, paste the following line at the top of the home.html file.
{% load staticfiles %} If you are running the latest version of Django then add, {% load static %} instead of {% load staticfiles %}.
Otherwise, you may get an error. That's it. Now you can modify and customize your blog as you like.
Step 7: Unique URL for an article
We need to set up separate URLs for articles so that when the users click each post on the home page, they will be redirected to another page that contains that article in detail.
The thing is very easy. We need to create a separate template file for that and also create a separate view for that. First of all, open views.py and add the following class to that.
class ArticleDetailView(DetailView): model = Article template_name = 'detail.html' Also, don't forget to import DetailView on the first line. So, modify the first line as follows.
from django.views.generic import ListView, DetailView Next, we need to create a new file for the detailed article. So, create a new file called 'detail.html' inside the templates folder. Paste the following code snippet into the 'detail.html' file.
{% load static %} <!DOCTYPE html> <html lang="en"> <head> <meta charset="UTF-8"> <meta name="viewport" content="width=device-width, initial-scale=1.0"> <meta http-equiv="X-UA-Compatible" content="ie=edge"> <link rel="stylesheet" href="{% static 'css/style.css' %}"> <title>My Blog</title> </head> <body> <header> <h1> <a href="">My Personal Blog</a> </h1> </header> <div class="container"> {% block content %} <div class="details"> <h2>{{ article.title }}</h2> <p>{{ article.body }}</p> </div> {% endblock content %} </div> </body> </html> Note that we added {{ article.title }} and {{ article.body }} here. These will fetch our article's title and body part into the page.
Now, we have to mention the URL to urls.py. So open urls.py in the articles folder and add the following line of code as the path.
path('article/<int:pk>', views.ArticleDetailView.as_view(), name='detail'), The int.pk in this file indicates the primary key. pk stands for the primary key here. The database automatically gives a unique ID for each article. That unique ID is also called the primary key.
Now, open home.html and add the href link to the h3 article heading. So, modify the line that contains the <h3> tag, inside the class article as follows.
<h3><a href="{% url 'detail' i.pk %}">{{ i.title }}</a></h3> That's it. Our blog is ready to run. Your server should be automatically reloaded by now.
Open your terminal (command line), copy the URL there, and paste it on a new tab in your browser. You can see your project running on your browser.
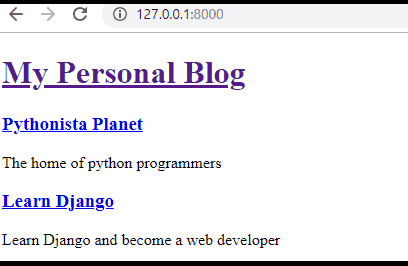
We can see that our Django blog is working perfectly. You can click and visit each article and it will function just like a normal blog.
This is just a basic blog with no styles or attractive design. But, now you know how to create a blog from the back end using Django.
You can create your own beautiful good looking blog using these steps and applying your front-end skills on top of it.
I know you may fall into some errors while doing this project. Here is a link to my GitHub repository, where you can find all the files and code. Make sure that you haven't messed up with the file structure.
Try to fix the errors by debugging it by yourself. If you need any help, please feel free to ask your doubts in the comments section down below.
I hope you like this article. Let me know your thoughts on this article and also, share it with your friends so that someone else could benefit from this tutorial.
How To Build A Blog With Python
Source: https://pythonistaplanet.com/how-to-create-blog-using-django/
Posted by: batcheldersweir1967.blogspot.com
0 Response to "How To Build A Blog With Python"
Post a Comment